Accurate financial records are vital for firms that use QuickBooks. QuickBooks offers an easy-to-use platform for efficiently managing spending. Sometimes you may need to update or correct an expense record.
In this post, you can learn to edit an expense in QuickBooks Online through a step-by-step guide suggested by certified experts.
- You can run profitability reports by recording customer expenses in QuickBooks Online.
- Customers can be billed back for items purchased on their behalf.
- Accounts payable helps you manage your bills.
- You can create purchase orders and deliver them to your suppliers.
What are the Steps to Enter and Set-Up Expenses in QuickBooks Online?
Below, you can learn how to enter expenses in QuickBooks Online, as well as how to delete, edit, and edit an expense in QuickBooks Online and previously entered charges.
Tip: In case you are thinking of creating a large number of expenses then instead of recording them one by one you can enter them in Account History which is more easy.
How to Create or Enter Expenses in QuickBooks Online?
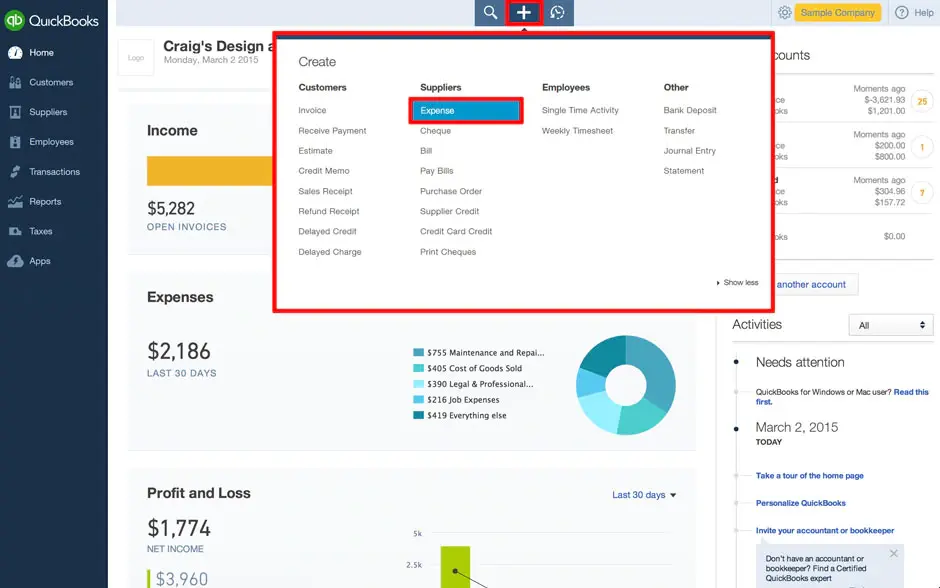
- You have to click on the (+) icon or Create menu from the top menu bar.
- Then you have to select the Expenses option that is under the Supplier column.
- Enter the supplier or vendor’s name in the payee field and then click Add. It is up to you whether you mention the name of a person or a business. If your transaction includes many small cash charges, you may leave this field blank.
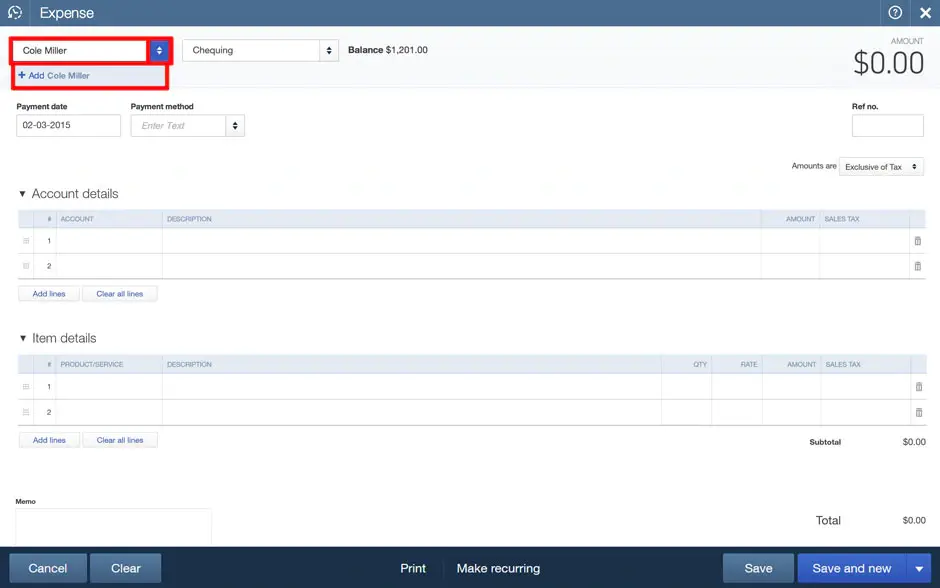
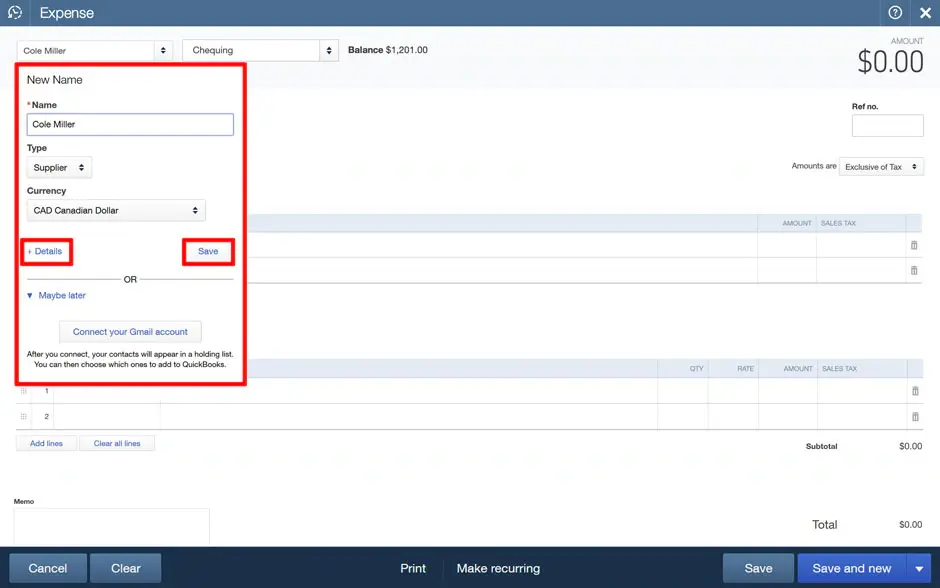
- You have to click on +details to add more information like the type of currency & supplier or vendor, etc. To do it later you can select Save.
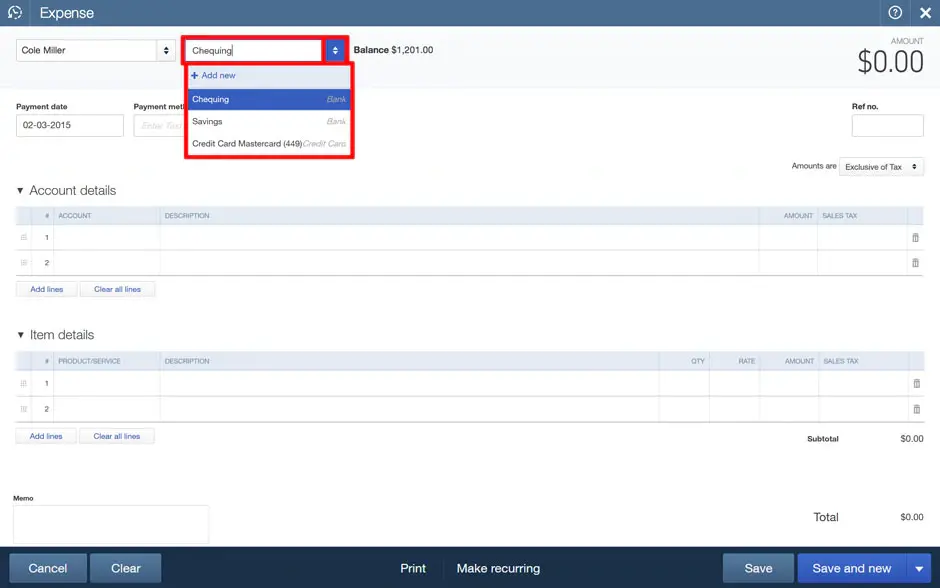
- After that, you have to choose a Payment Account from which the money purchased is going to be deducted. You have to always remember that if you are using a debit card for the transaction then you have to choose a Chequing Account, it doesn’t matter that if the card has a Visa or Mastercard logo on it.
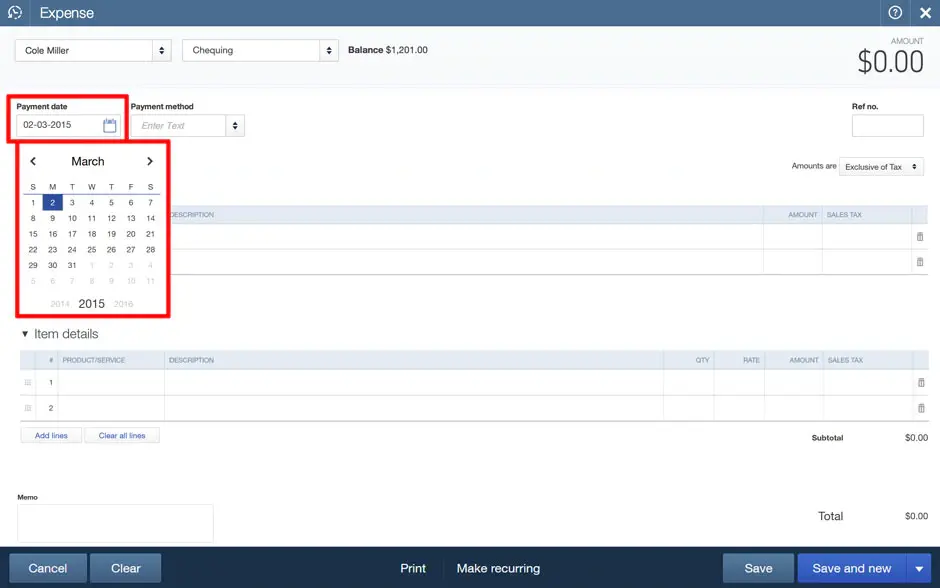
- Now you are required to enter the date of purchase in the payment field.
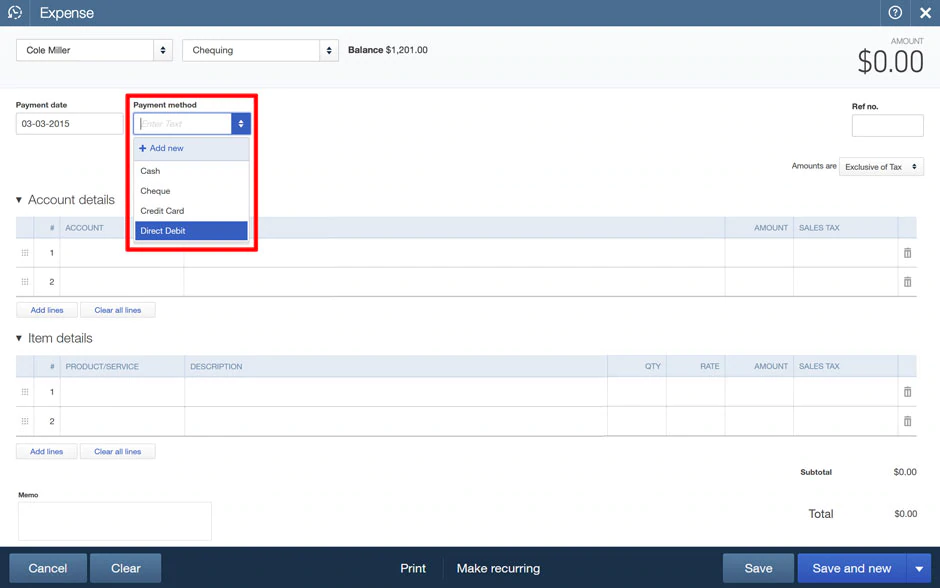
- In the payment method field, you must select how you want to make your purchase. For example- credit card, debit card, cheque, or cash.
- Under Account, you have to choose a category for the purchase that you have made.
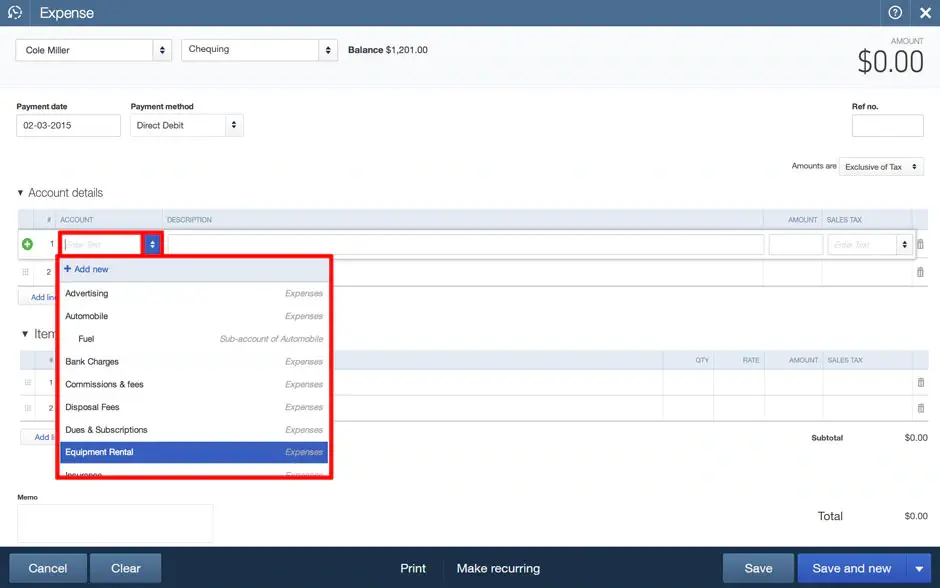
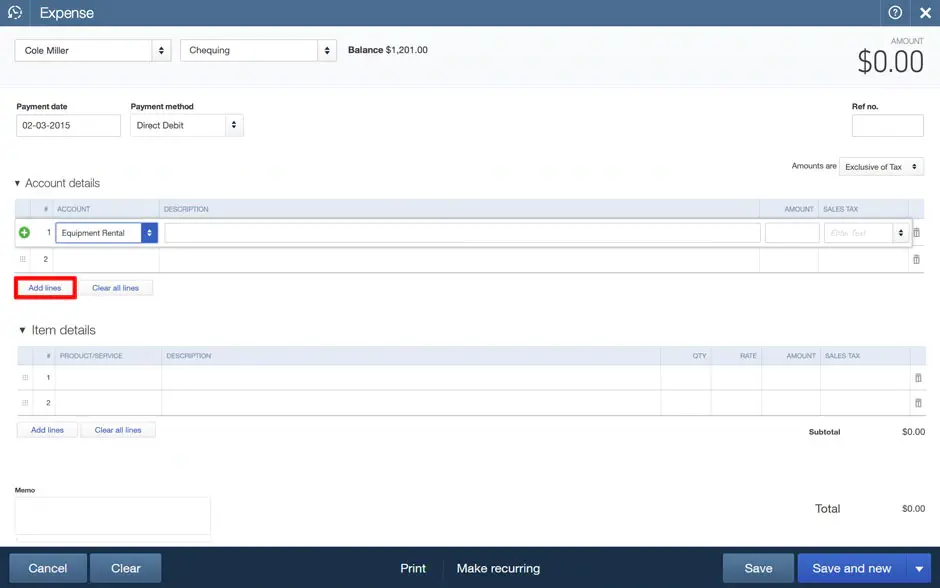
- Note: If you are unable to find the category for a specific item, you can add a new category and amount by choosing the Add Lines option.
- (Optional) For tracking, put an identification number from the purchase receipt into the Ref. No field. (NOTE: QuickBooks Online Plus customers can enable location and class monitoring under the Account & Settings menu. After that, a new location and class tracking fields will be displayed.
- (Optional) In the Description field, describe the purchased goods or services.
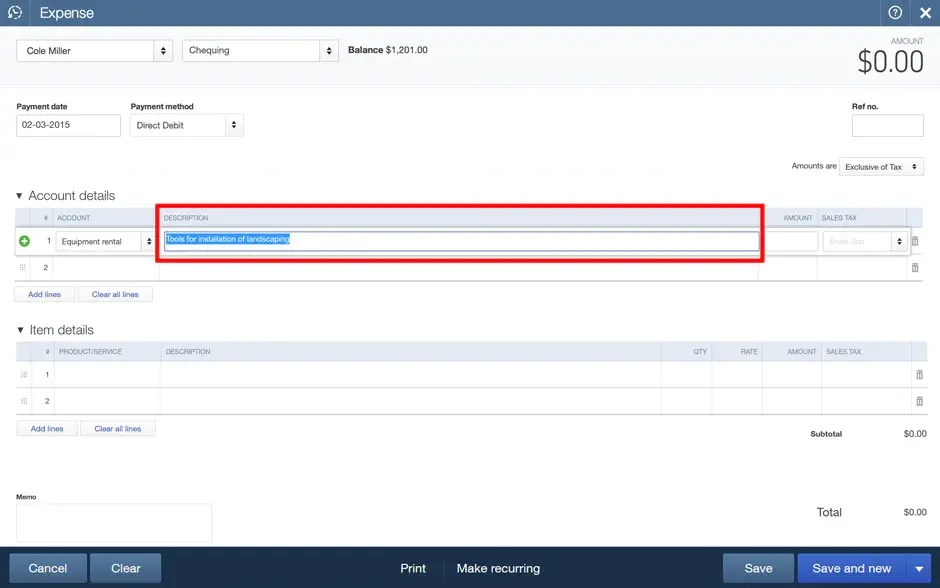
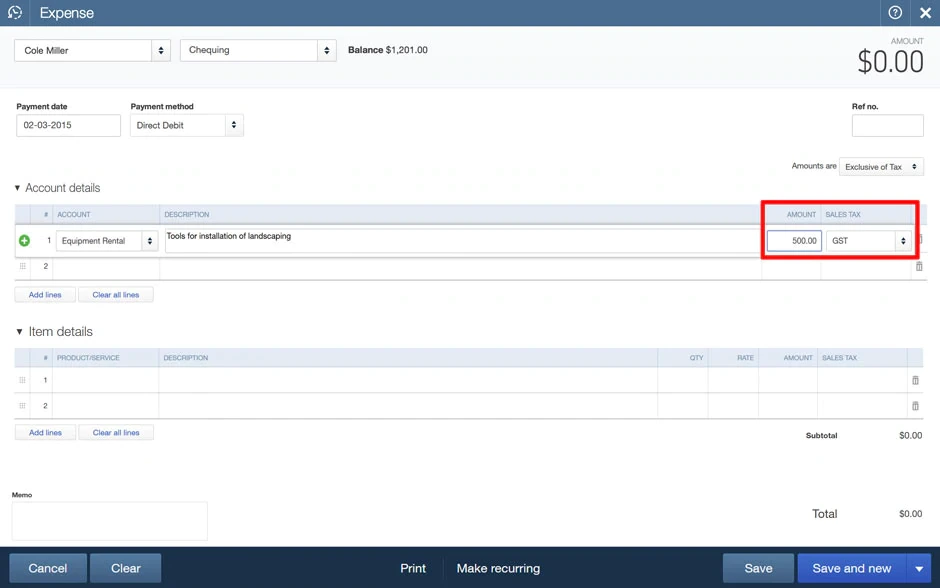
- You must enter the amount of the purchased item in the amount field, and if applicable, you may include tax in the Tax field.
If you wish to create another expense, click Save and New, or Save and Close when you’re ready.
Also Read: QuickBooks Won’t Send Email Invoices Error
Some Methods to Explore for Tracking Spending Before Saving and Closing
- If you have turned on the Billable Expense Tracking function, you will see the Billable column as well. Then checkmark the Billable column and enter the customer’s name. You can use this feature if you are billing a specific customer. To enable this option, you have to go to Accounts and Settings>Expenses Tab.
NOTE: If you received credit for an expense that was last time billed to a customer, make sure to specify that customer on the credit and also checkmark the Billable option. Otherwise, the customer will be invoiced for the expenses on the following invoice, and the credit will not appear.
- If you want to see an income vs expense report for every customer, run the Income by Customer Summary Report.
- You should also provide a quick comment or Memo if you want it to be displayed on purchase reports or in the Account History.
- If you are using an expense voucher, make sure to print it so you can keep a voucher’s paper copy.
Edit Expenses in QuickBooks Online
Remember that any edit you make to an expense billed to a customer may also change the customer’s invoice.
- From the left-side navigation panel, you have to select the Expenses option, and then click on it.
- In the Expense Transaction box, find the expense you wish to edit.
- Then, select View/edit from the action column.
- You can make the changes in the transaction that are needed.
- When finished, click Save and Close.
Delete Expenses in QuickBooks Online
- From the left-side navigation panel, you can select the Expenses option, and then click on it.
- You have to search for the transaction you want to delete in the Expense Transaction window.
- Then, click the Action drop-down box and you can select the Delete option.
- If you are sure, then you can select Yes to remove the charge. The Audit log still contains data on previously deleted spending. To access the audit log, navigate to the left side and type Audit log into the search bar.
Below you Will Find a Complete Description of Each Feature:
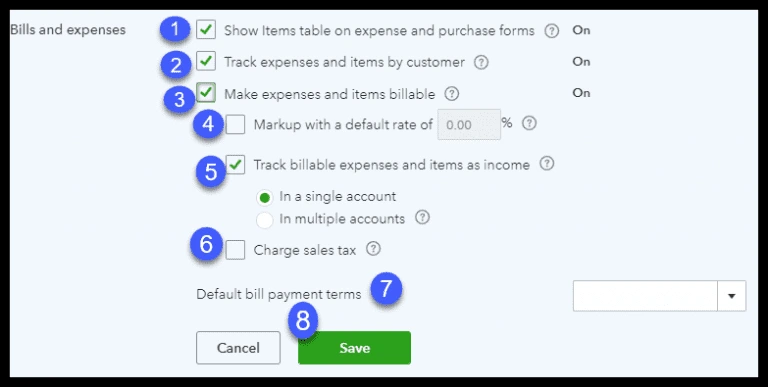
- Show items table on expenditure and purchase forms: This feature adds a Product/Service table to the expense and purchase forms, allowing you to itemize products and services purchased.
- Track expenses and items by customer: If you buy an item on behalf of a buyer and wish to link it with that buyer, this feature allows you to add a custom column to expense and purchase forms.
- Make expenses and items billable: With this feature, you may include a billable field on expense and purchase forms, allowing you to charge the buyer for items that are purchased on their behalf.
- Set a default markup rate: This feature is only available if you have switched on the make expenses and items chargeable. It allows you to provide a default markup rate for things you intend to bill your customer for.
- Track billable expenses and items as income: This feature is only available if you have enabled the make expenses and items chargeable features listed above. You can choose to track this income in one or more than one account.
- Charge sales tax: If you need to charge your customers’ sales tax, activate this feature.
- Set up default payment terms: This feature lets you specify default payment terms for all bills entered into QuickBooks. If the payment terms differ amongst suppliers, you can edit them in the vendor profile when you create your vendors in QuickBooks. Setting up a payment in the vendor profile will send you reminders when a bill is due.
- Purchase orders: This feature requires you to purchase orders for upper suppliers. You are required to enable this functionality here.
Also Read: Import invoices in QuickBooks Online
How Setting up and Entering Expenses in QuickBooks Can Benefit Your Business?
As we mentioned in previous sections, there are various options to choose from when setting up expenses in QuickBooks Online. Now the question is, “Is it even worthwhile to spend time setting up and entering expenses in QuickBooks?”
To address this, consider the benefits of recording expenses in QuickBooks Online.
1. Pay bills on time
This can help you keep your account payable bills current at all times, allowing you to retain a solid credit score. In addition, anytime you start QuickBooks software, you will be presented with a list of supplier bills that are due. This can help you keep your account payable bills current at all times, allowing you to retain a solid credit score.
2. Easily get payments for all purchased items on behalf of your customer
If you have purchased things on behalf of your customers, you may keep track of them using QuickBooks. Using the “mark expenses and billable” tool, you can assign expenses to the customer who should be billed for the item.
3. Track Sales Tax
If you sell any products that need sales tax, QuickBooks will automatically calculate the tax for you. All you have to do is run a report to find out how much sales tax you need to pay the state.
Conclusion!
Editing an expense in QuickBooks Online is a straightforward process that allows you to keep your financial records accurate and up-to-date. Whether you need to edit an expense in QuickBooks Online to correct a typo, adjust the amount, or change the account it was categorized to, QuickBooks offers the flexibility to make necessary changes with ease. Remember to save any updates you make and, if needed, review related reports to ensure that all data reflects the updated information. This helps maintain accurate bookkeeping, which is important for tracking your business’s financial health. If you are still facing any issues, then you can call the helpdesk team.
Also Read: How to write off an invoice in QuickBooks?
Frequently Asked Questions (FAQs
Q1. Can I edit an expense in QuickBooks Online that has already been reconciled?
Ans. Yes, but remember it will affect your reconciliation reports. After making changes, you may need to reconcile your accounts again to ensure accuracy.
Q2. How do I change the vendor on an expense?
Ans. To change the vendor on an existing expense, you have to simply open the expense, click the dropdown menu under the “Payee” field, select the new vendor, and save your changes.
Q3. Will editing an expense affect my reports?
Ans. Yes, editing an expense will update your financial reports. Any changes you make will automatically reflect in reports such as the Profit and Loss statement, Balance Sheet, and other related financial reports.
Q4. Can I delete an expense instead of editing it?
Ans. Yes, you can delete an expense if it was entered by mistake. However, deleting an expense will remove it from your financial records, so ensure that it’s no longer needed before doing so.
Q5. What should I do if I can’t find the expense I want to edit?
Ans. If you can’t locate the expense, try using the search bar or filter options in the “Expenses” section. You can search by date, vendor, or amount to quickly find the transaction.