

The QuickBooks error the file you specified cannot be opened is a common issue encountered when users try to access a company file, backup, or certain features within QuickBooks Desktop. This error typically arises due to permissions conflicts, file path restrictions, or issues with the QuickBooks installation. Understanding the cause and troubleshooting effectively is important to resolving this problem and restoring seamless functionality.
What is QuickBooks Error The File You Specified Cannot Be Opened?
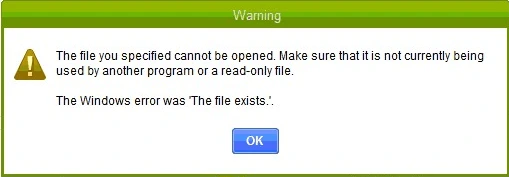
Going in deep makes sense only if you have a basic understanding of what this error is all about. You may encounter such an issue while performing various accounting procedures, such as paying scheduled bills, opening a state/federal form, or getting payroll updates. This error appears on the screen and states:
| Payroll Error: | “The file you specified cannot be opened” It must not be already in use by another program or a read-only file. |
| Error: | “The Windows Error was The File Exist |
You may encounter such an issue while performing various accounting processes such as paying scheduled bills, opening a state/federal form, or downloading a payroll update. There could be several circumstances that cause such an error in QuickBooks.
What Causes QuickBooks Error The File You Specified Cannot Be Opened?
There are a few reasons why payroll issues occur. Let’s examine each element separately:
- You may see such an error if your internet connection is poor or inactive.
- If the firewall is improper or outdated prepare for a similar issue,
- You may also see such an error if your internet security settings are incorrect.
- This issue is more likely to occur if the QuickBooks application file is out of current.
- If the software is paused by Windows user account management, this error is almost certain to happen.
- If you have not given enough permission, make sure to do so or you will fall victim to his particular error.
Points to Remember Before Fixing QuickBooks Error The File You Specified Cannot Be Opened
Some advance tips for resolving the above error:
- Click ‘OK’ until the error message gets 100% updated Now close and reopen QuickBooks.
- Ensure that QuickBooks is the most recent version.
- Close QuickBooks and restart your desktop.
- After restarting QuickBooks Desktop, right-click QuickBooks and select ‘Run as Administrator’.
If the error does not get fixed then:
- When downloading updates, connect to the internet using a data cable. Using the WI-FI connection for updates may lead to unexpected results.
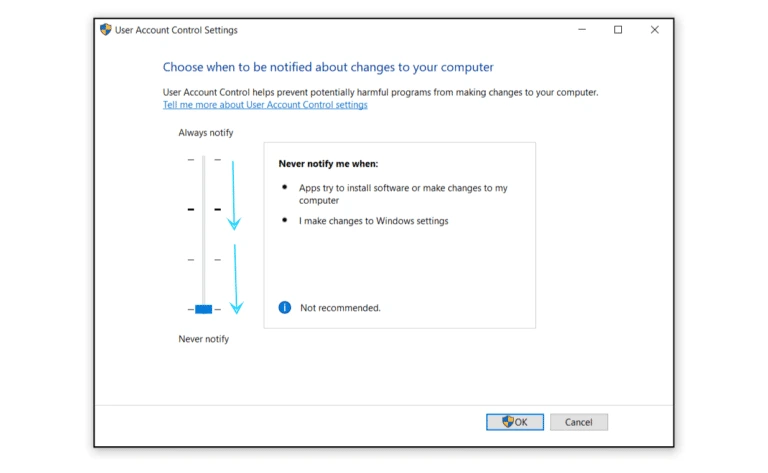
- Now open the user account control settings.
- Go to ‘Control Panel’
- If you are using Windows 7, click on the ‘Windows’ button, then click on ‘Control Panel’.
- If you are using Windows 8, open the ‘Start’ menu and search for ‘Control panel’. Click on the control panel.
- If you are using Windows 10, pick the ‘Search icon’ in the taskbar and type ‘Control Panel’. After you’ve found it, tap it to open it.
- After opening the control panel, use the search box to find ‘Change User Account Control’ settings.
- Now do one of the following things:
- Turn off UAC by moving the slider to “Never notify” and then selecting ‘OK’. If prompted, confirm by entering the password. Now, restart your device to ‘allow’ the changes.
- Turn on UAC: Move the slider to specify when you want to be notified, then press ‘OK’. If prompted, enter the password or provide confirmation.
Steps Fix QuickBooks Error The File You Specified Cannot Be Opened
Below are a few simple techniques to troubleshoot the ongoing problem:
Step 1: Ensure QuickBooks is updated
Many QuickBooks customers are unaware that updates frequently remedy several QuickBooks issues, thereby improving the software’s functionality. As a result, it is often recommended that you update QuickBooks regularly to ensure consistent and secure QuickBooks performance. The steps for updating QuickBooks to the current release are as follows:
- Press the F2 key when the QuickBooks Desktop is open to open the product information window.
- Choose the correct QuickBooks version.

- Choose the option Get the latest updates.
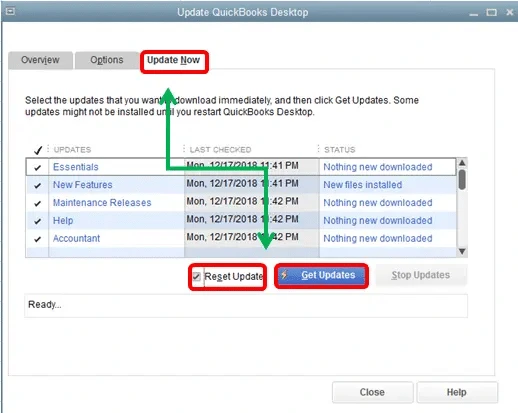
- Create a new folder and save the file.
- To start the update process double-click the installation file.
- Restart the system and see if the problem is resolved.
Step 2: Configure the internet and firewall security settings
You can attempt configuring the internet/firewall settings required for the insertion of new inbound and outbound rules to the QuickBooks Windows firewall.
- In the Start menu, select the Control Panel link.
- Select Windows Firewall and then click Advanced Settings.
- After that, pick the Inbound tab.
- To create a new inbound rule, go to the New Rule page.
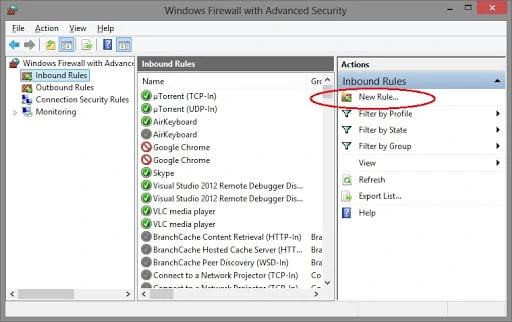
- Select the Port tab.
- Choose the next tab.
- The number of ports can now be entered.
- You will now need to navigate to the next tab.
- Also, click the next tab and go to the Allow Connection option.

- Give the firewall a rule name and then click the Finish tab.
Step 3: Appropriate Windows permissions for QuickBooks
Relevant permissions are important for ensuring that the software runs smoothly on Windows platforms. You can try setting the permissions specified below to grant the necessary rights.
- To begin, right-click the ‘QuickBooks Desktop icon’ and select the ‘Properties option’. Also, choose the ‘Security’ tab and select ‘Edit’.
| Processor Type | File Path for QBW32.EXE |
| 32-bit | C:\program files\intuit\quickbooks (year) |
| 64-bit | C:\program files x86\intuit\quickbooks (year) |
- The next step requires the user to select the ‘Add’ option and input ‘Everyone’.
- After that, the user must click ‘OK’ before selecting the ‘Full Control’ option.
- Repeat Steps 2 and 3, but enter ‘Users’ instead of ‘Everyone’. Proceed by selecting ‘Apply’.
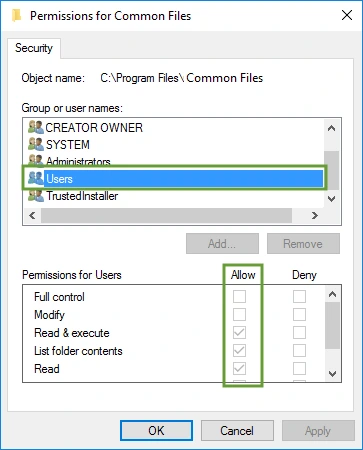
- Finally, click ‘OK’ and you are done.
Note: To completely resolve the issue, right-click the QuickBooks icon and select Run as Administrator. If it does not work, the user can try the following steps.
Step 4: Change the User Account Control Settings
Perform the previous task, but only after temporarily turning off ‘User Account Control’. If the error is eliminated, it indicates that the current security setting is incompatible with QuickBooks. The following are the actions you must take:
- To open the control panel press the Windows + R keys.
- Find the user accounts using the search bar.
- Select Change User Account Control Settings.
- Click the yes tab, drag the slider down to never notify, and then disable UAC.
- Reboot the system, then update QuickBooks Desktop.
- Payroll errors must have been resolved now.
Step 5: Configuring the Internet and Firewall security settings
QuickBooks Desktop may be inaccessible in some cases due to firewall and internet security settings. Therefore, try to set up the firewall and internet settings may work to your advantage.
- In the start menu click on the control panel link.
- Click Advanced Settings after selecting Windows Firewall.
- You must now pick the Inbound tab.
- To add a new inbound rule, go to the New Rule tab.

- Click on the port tab.
- Go to the next tab.
- The number of ports must now be specified.
- When finished, select the next tab.
- After selecting Allow Connection, proceed to the next option.
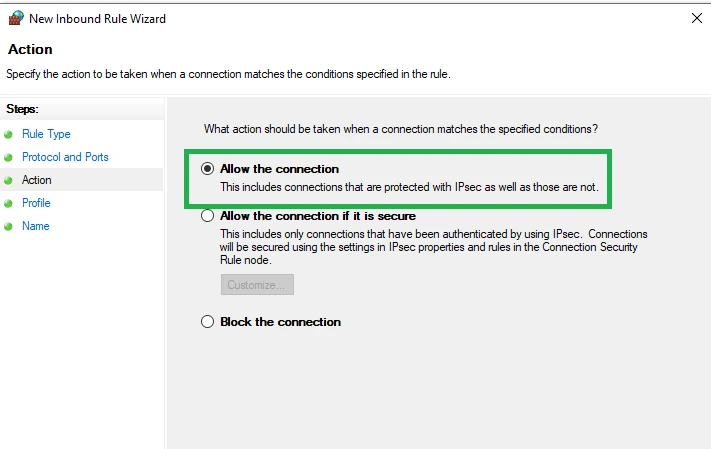
- Give this firewall rule a name and click the Finish tab.
Step 6: Run Reboot.bat
When QuickBooks Desktop processes become stuck, a restart can be the perfect solution. To give it a fresh start, run reboot.bat.
- You need to exit from QuickBooks Desktop.
- Additionally, you can choose the Properties tab by right-clicking the QuickBooks icon on your desktop.
- Go to the open file folder and search the reboot.bat file.
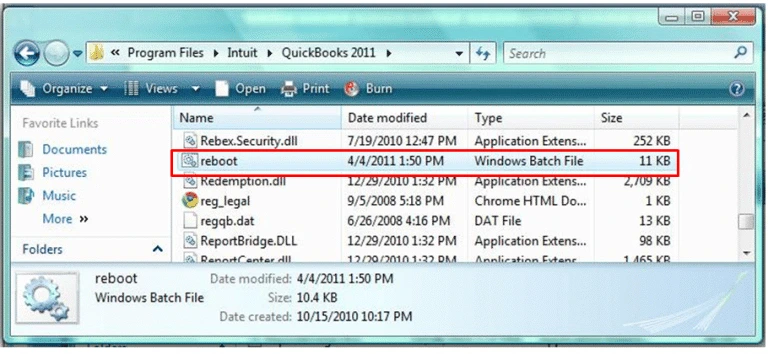
- Right-click the reboot.bat file and pick the run as administrator option.
- Wait a few minutes for the command prompt to scroll all the files.
- Reboot Windows and see whether the message QuickBooks error the file you specified cannot be opened persists.
Step 7: Fixing QuickBooks Desktop
Running a QuickBooks repair will help you determine whether your QuickBooks folders and files require maintenance.
Step 8: Reinstalling QuickBooks Desktop with the help of a clean install
QuickBooks users can choose for a clean install to replace old files with fresh ones. This can work because newly installed software rarely causes such problems. The steps in this process are the following:
- Open the run tab by clicking the Windows+R.
- Enter the text appwiz.cpl and select the enter tab.

- Once completed, click on the QuickBooks software and select the uninstall tab.
- Download the clean installation tool.
- To install the QuickBooks desktop software again you can use this tool.
- While reinstalling QuickBooks software you will need your license and product keys.
Conclusion!
Experiencing the QuickBooks error The file you specified cannot be opened can be frustrating, but it is often resolvable with the right steps. This error may occur due to issues such as insufficient user permissions, damaged QuickBooks company files, or interference from antivirus software. By systematically troubleshooting using the steps outlined—checking file permissions, ensuring file location accessibility, repairing the file, and verifying system settings—you can restore access to your file efficiently. If these solutions do not resolve the issue, reach out to our customer support for further assistance.
Frequently Asked Questions:
Q1. Why am I seeing the QuickBooks error the file you specified cannot be opened” error?
Ans. This error typically occurs due to reasons like insufficient permissions to access the file, corruption of the QuickBooks company file, a missing or moved file location, or interference from antivirus or firewall software.
Q2. Can antivirus software block QuickBooks from opening the file?
Ans. Yes, antivirus or firewall software can block QuickBooks from accessing its files. Try temporarily disabling your antivirus software or adding QuickBooks as an exception in the antivirus settings.
Q3. Is it safe to move the QuickBooks file to a different location?
Ans. Yes, moving the QuickBooks file to a local drive can help identify if the issue is related to the file location. However, ensure no active QuickBooks processes are using the file while moving it, and update the file path in QuickBooks to avoid connection errors.